Getting Started
This page gets you from an empty URP scene to rain and puddles. There are five steps, and most of them are a single menu click.
Requirements
- Unity 6.3 (6000.3.22f1) or newer.
- The Universal Render Pipeline (URP) 17.3. Puddlecraft depends on
com.unity.render-pipelines.universal.
1. Install the package
Import Puddlecraft into your project. It shows up as the package Puddlecraft - Procedural Puddles & Rain
(com.dfa.puddlecraft), and everything it adds to the menus lives under Tools > Puddlecraft.
2. Add the renderer feature
Puddlecraft draws through a URP renderer feature. Every renderer that should show rain and puddles needs it, so don't skip this one.
The quick way is Tools > Puddlecraft > Add Renderer Feature to Active Renderers, which adds it to every URP renderer in use. Once they all have it, the menu item greys itself out. To do it by hand, select a Universal Renderer Data asset and use Add Renderer Feature > Puddlecraft.
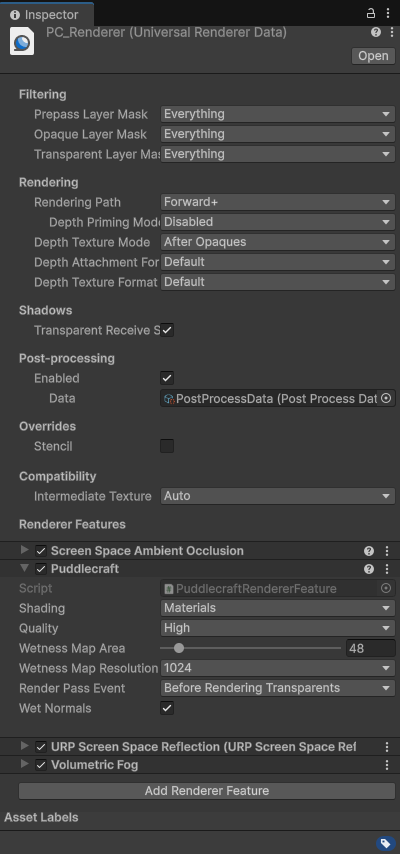
The feature's settings apply per renderer:
| Setting | What it does |
|---|---|
| Shading | Overlay (default) draws placed puddles over the finished image, on any material. Materials lets your materials draw all the water. See Wet Ground & Materials. |
| Quality | High, Medium or Low. Use a lower tier on renderers for mobile or low-end PCs. |
| Wetness Map Area | Materials mode only: the square around the camera that placed puddles show in, in metres (48 m by default). |
| Wetness Map Resolution | Texels along each side of that map. |
| Render Pass Event | When in the frame puddles are drawn. Keep it after opaques, because puddles need the depth texture. |
| Wet Normals | Forward and Forward+ only: Puddlecraft/Lit (Wet) also writes the wet normal and smoothness into the camera normals texture, for screen-space reflections. Off by default. See Forward, Forward+ and Deferred. |
3. Add a controller
Each scene needs one Puddlecraft controller. Use Tools > Puddlecraft > Create Controller, or add Puddlecraft > Puddlecraft Controller to any GameObject. Think of it as the scene's weather desk: it holds the weather, the rain preset (how it all looks), which layers get wet and which block rain, the rain cover and the bakes.
Open its Setup tab and choose which layers Get Wet and which Block Rain (roofs, awnings, trees, bridges). The same tab tells you whether the renderer feature is installed, which is handy if step 2 got skipped.
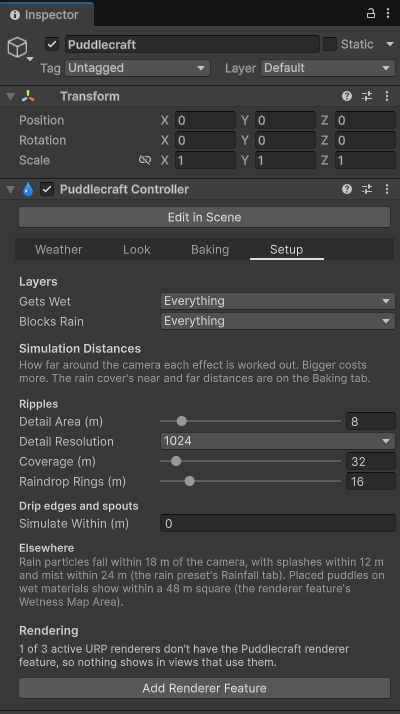
Now turn up Weather > Intensity and enter Play mode. The rain starts, and the ground starts getting wet.
Wind comes from the scene's directional Wind Zone. No Wind Zone, no wind.
4. Set up your materials
With the default Overlay shading, placed puddles already work on any material. Wet ground and procedural puddles are a different story: your materials need to know about the rain. Pick whichever fits:
- URP Lit materials: switch the shader to Puddlecraft/Lit (Wet). Every property carries over, so there's nothing to redo.
- Shader Graph: add the puddlecraft-wetness node.
- Custom HLSL: call
PuddlecraftWetness.
Wet Ground & Materials walks through each option, along with the two settings you'll tune per material, Porosity and Puddles.
5. Place puddles
Two ways in. Tools > Puddlecraft > Edit Puddles in Scene lets you stamp puddles by hand. Or select some ground objects and use Tools > Puddlecraft > Populate Selection with Puddles to scatter puddles over their flat, rain-exposed spots. More in Puddles & Splats.
Try the demo
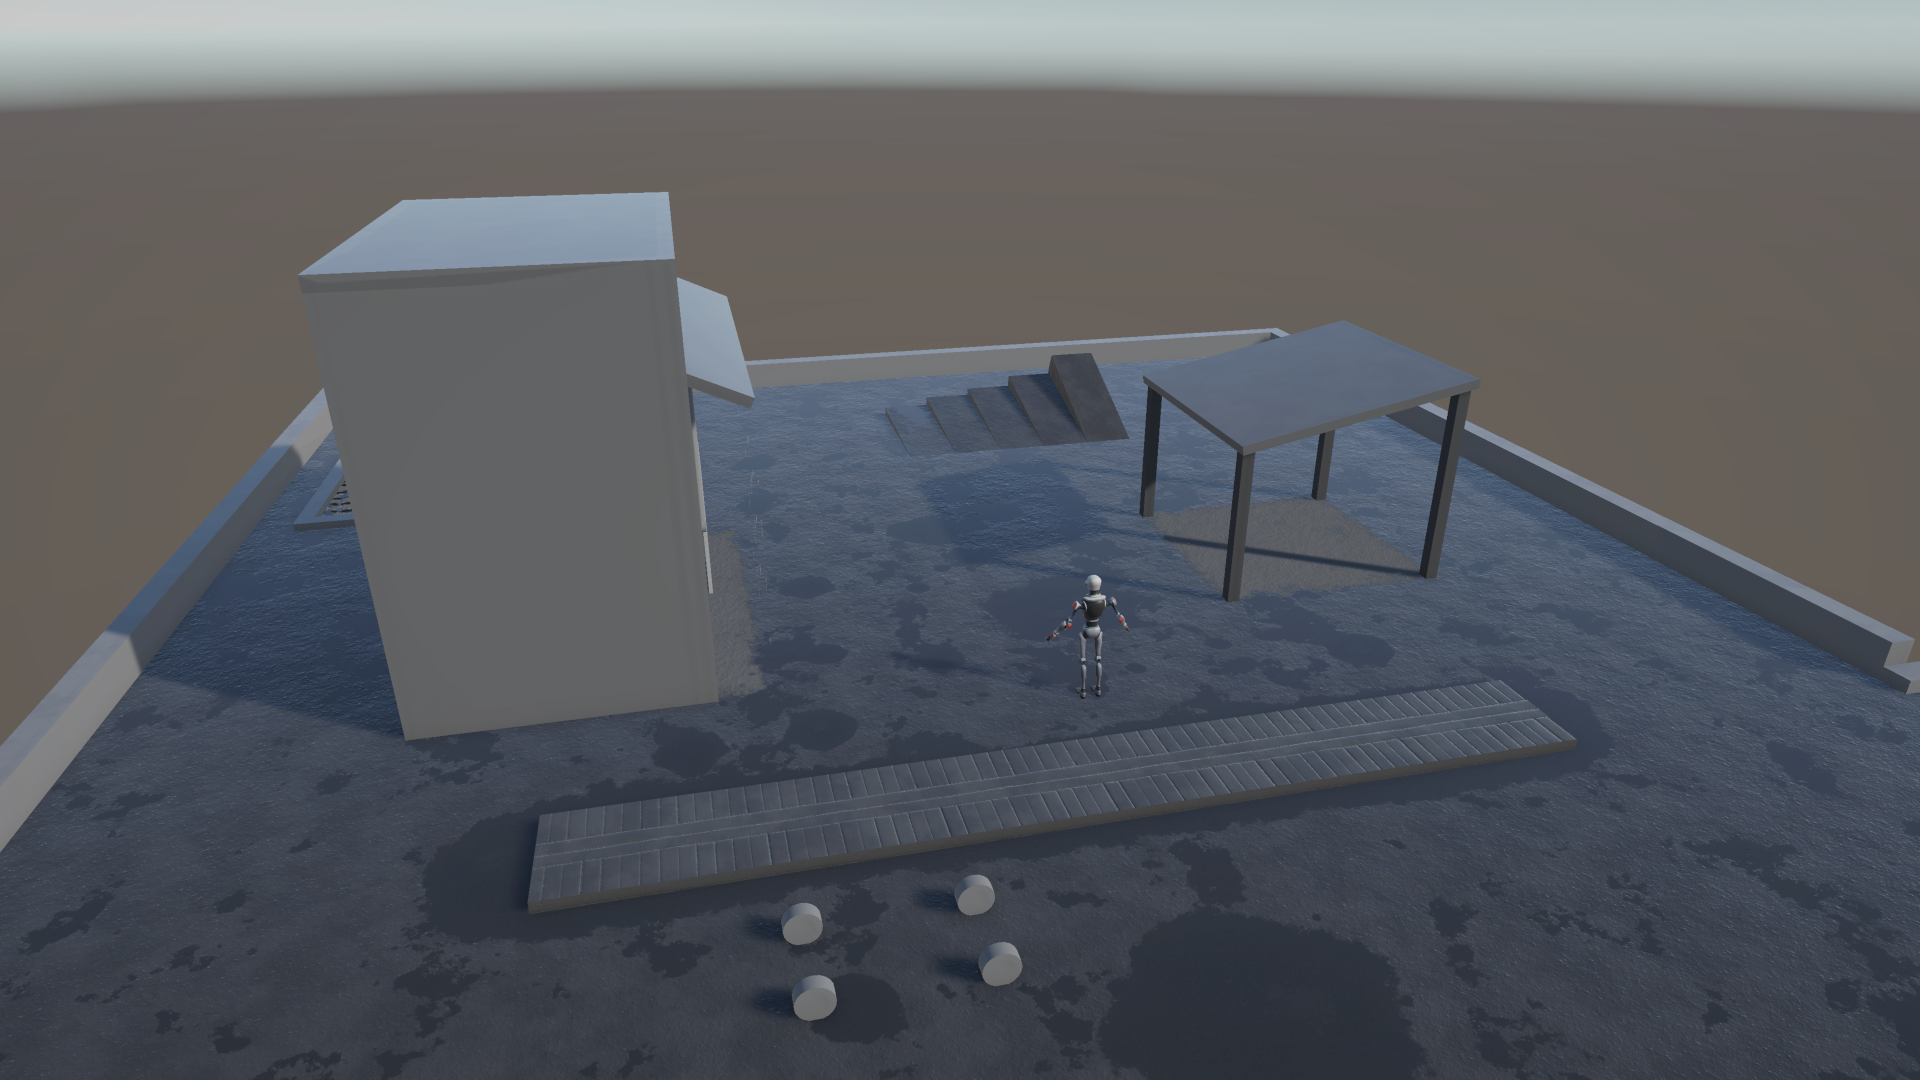
The Demo sample is a greybox scene with every feature already set up: placed puddles, heightmap puddles on cobbles, a kerb gutter, ramps that hold less water the steeper they get, rain cover under an awning, a drip edge and a rain spout.
Import it from the Package Manager (select Puddlecraft, then Samples > Demo > Import) and open
puddlecraft-demo.unity. Press Play and a panel lets you jump the camera between viewpoints and play with the weather.
Time runs faster than normal, so you can watch the ground get wet and dry again without waiting around.
Press Walk to wander around as a robot: WASD or the arrow keys, Shift to run, Space to jump, right mouse button to look, scroll to zoom. Its footsteps press ripples into the puddles. Go on, jump in one.
Next steps
- Controller & Rain Presets: the weather, the look and the bakes.
- Rain Cover: keeping rain off the ground under roofs.
- Drip Edges & Spouts: water dripping from ledges and pouring from drainpipes.
- Audio: add Puddlecraft > Puddlecraft Audio to the scene for procedural rain sound, drips and spouts.
- Scripting: drive the weather and react to water from code.
Scripted setup
Setting scenes up from build scripts or CI? PuddlecraftSetup does the setup from code: it gets or creates the controller, adds the renderer features, bakes the rain cover and rebakes the puddles.
using DFA.Puddlecraft;
using DFA.PuddlecraftEditor;
using UnityEngine;

public static class SceneSetup
{
    // Call from an editor script with the scene open and saved.
    public static void SetUp()
    {
        PuddlecraftController controller = PuddlecraftSetup.GetOrCreateController();

        // Only needed when the rain cover is Baked rather than Realtime.
        if (controller.coverMode == RainCoverMode.Baked &&
            !PuddlecraftSetup.BakeRainCover(controller, out string message))
            Debug.LogWarning(message);

        PuddlecraftSetup.RebakePuddles();
        // Save the scene afterwards to write the puddle bake used in builds.
    }
}